Appearance
Starting a Workflow
A workflow sends a project or drawing round a review sequence. Starting one puts the first step in somebody's Approvals list and tells them about it.
Where it is
Two places, one dialog:
- Workflows (
/admin/workflows) → Start workflow in the command bar. Choose everything, including what the workflow runs against. - A project's page → Start workflow next to Edit and Duplicate. The project is already filled in; you only choose the template, the reviewer and the date.
Workflows is on the sidebar for admins and owners; Approvals is there for everyone.
Before the first time: install the standard templates
A new organisation starts with no workflow templates, so the first time you open the dialog it offers Install standard templates instead of a picker. That copies three ready-made review sequences into your organisation:
| Template | Sequence |
|---|---|
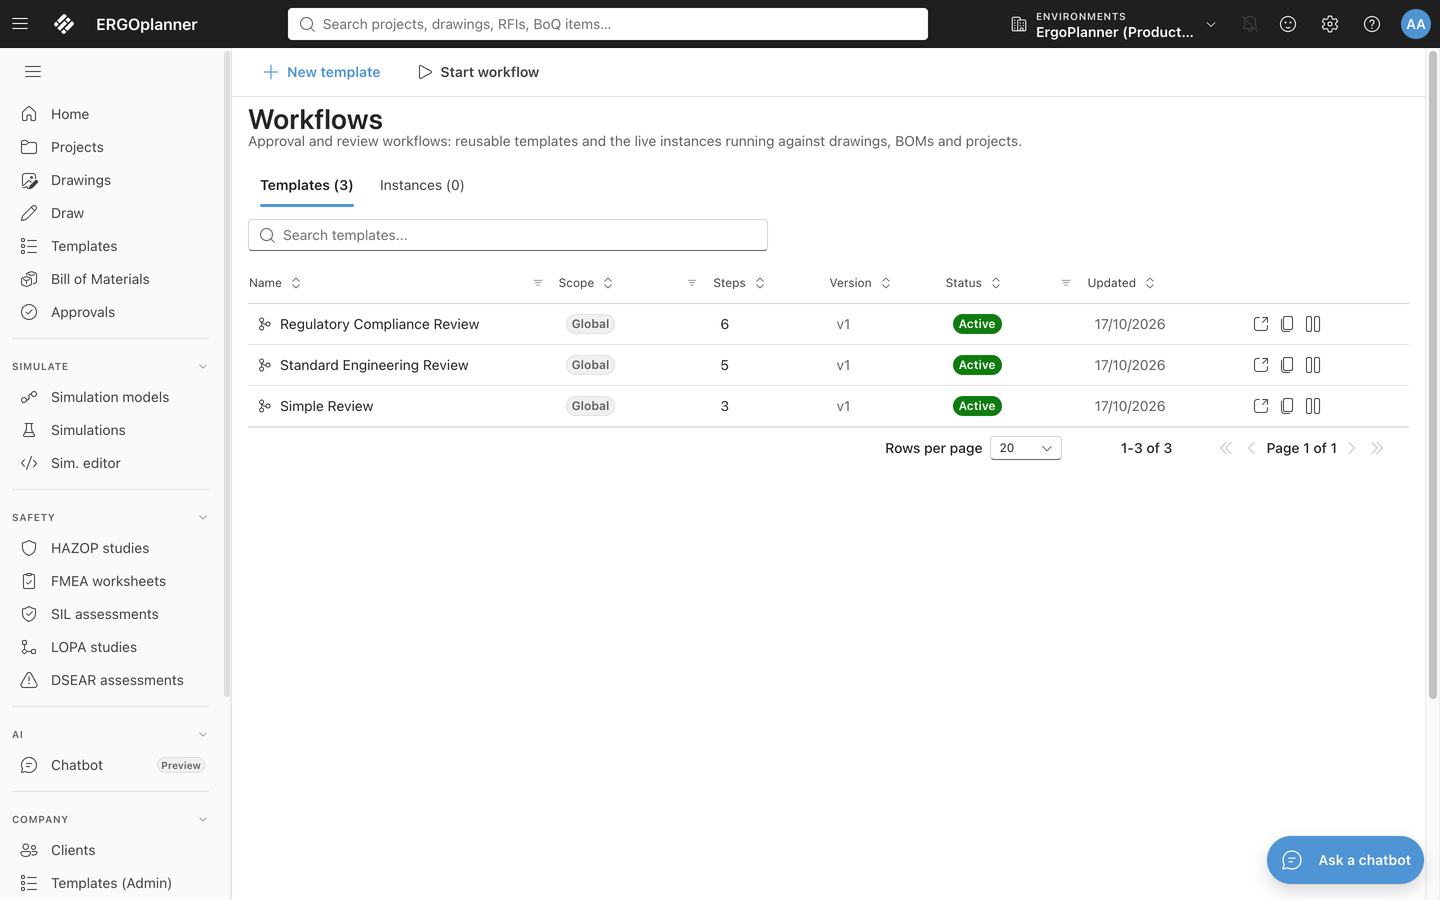
| Simple Review | Draft → Human Review → Released (3 steps) |
| Standard Engineering Review | Draft → Agent Cross-Review → Human Review → Final Approval → Released (5 steps) |
| Regulatory Compliance Review | Draft → Process Review → Standards Check → Client Review → Regulatory Approval → Released (6 steps) |
(The dialog's own blurb shortens the last two to "Standard Review" and "Regulatory Approval"; the installed templates carry the longer names above, and that is what the picker and the Workflows list show.)
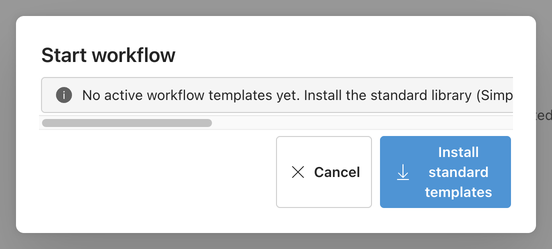
Press it once. It is safe to press again — templates you already have are left alone. After that the dialog shows the normal picker.
Starting one
- Open the dialog from either place above.
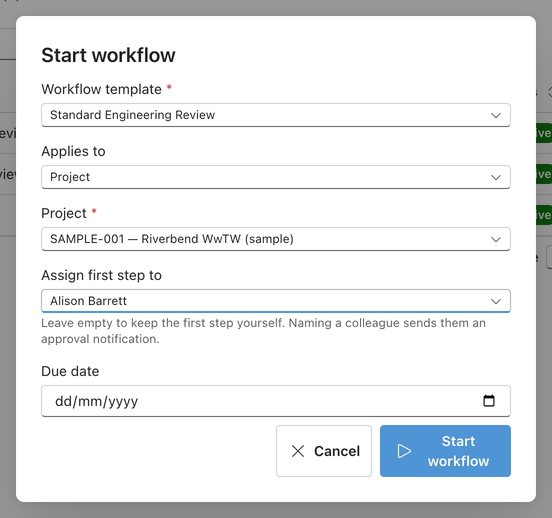
- Workflow template — only active templates are offered. If you have exactly one, it is already chosen.
- Applies to — Project or Drawing, then the specific one. Skipped when you started from a project's own page.
- Assign first step to — the colleague who should act on it. See below; you almost always want to set this.
- Due date — optional. It shows on their approvals list and orders it.
- Start workflow. You land on the new workflow's page.
Who gets it
If you name an assignee, the first step a person can act on becomes theirs: it appears in their Approvals list and they get a notification in the bell menu, deep-linked to the workflow. On all three standard templates that is the human review — the automated "Draft" ahead of it is skipped, because nothing runs it.
If you leave the assignee empty, the first step stays with you. Nothing is sent — the app does not notify you about your own action — and the workflow waits until you approve it yourself. This is occasionally what you want (starting a run you intend to walk through), but if you are handing work over, name the person.
The standard templates do not name anyone themselves. The assignee entries inside them refer to automated agents, not to people, so choosing a colleague in the dialog is the only thing that makes a workflow a hand-off.
If the first step names a discipline or role — every step of the Discipline review template does — the picker offers only the project members in that pool, and a one-person pool is assigned for you. Leaving it empty opens the step to the whole pool, or, when nobody on the project is in it, leaves it as Needs assignee. See Discipline-to-Discipline Review.
What happens next
The assignee opens Approvals, sees the step with its template name, the thing it is about and its due date, and picks Approve or Reject (with optional comments). Before approving, the dialog shows who the next step goes to and, when the next step has a pool of several people, lets the approver choose. The workflow then moves to the next step, assigns it, and notifies whoever it belongs to — never back to the approver by default: a next step that names nobody waits as Needs assignee. When there is no next step, the workflow completes.
Past the first step the reviewer can also Return to previous or Return to originator, sending the work back for rework with the comments as the reason; rejecting at the first step closes the workflow as Rejected. See Discipline-to-Discipline Review.
You can watch the whole run at Workflows → Instances, which lists every instance with its current step and status, and open one to see its history.
Things worth knowing
- The standard templates begin with a "Draft" step for an automated agent, and nothing runs it. So the workflow skips it and starts on the first step a person can act on — the human review. The skip is recorded in the workflow's history, with the reason, rather than being passed off as work that was done. The same applies to the agent cross-reviews in the longer templates.
- An inactive template cannot be started. Deactivated templates are not offered, and starting one another way is refused.
- A template with no steps cannot be started. Templates you create yourself with New template start out empty — open the template and add its steps. See Building a Template.
- Pausing, resuming and cancelling an instance are available on the workflow's own page.
- Email. Whether the approval notification also arrives by email depends on your organisation's mail configuration and the recipient's own email preference. The in-app notification and the approvals list are always the record.
See also
- Notifications — the bell menu the approval request lands in
- Creating Projects