Appearance
Identifying Hotspots
A hotspot is a region of the imported image that needs a symbol decision — either the detector found something it could not confidently classify, or you marked the region yourself. The Identify view assigns the right symbol; the canvas tools let you draw, move and delete hotspots manually.
The Identify view
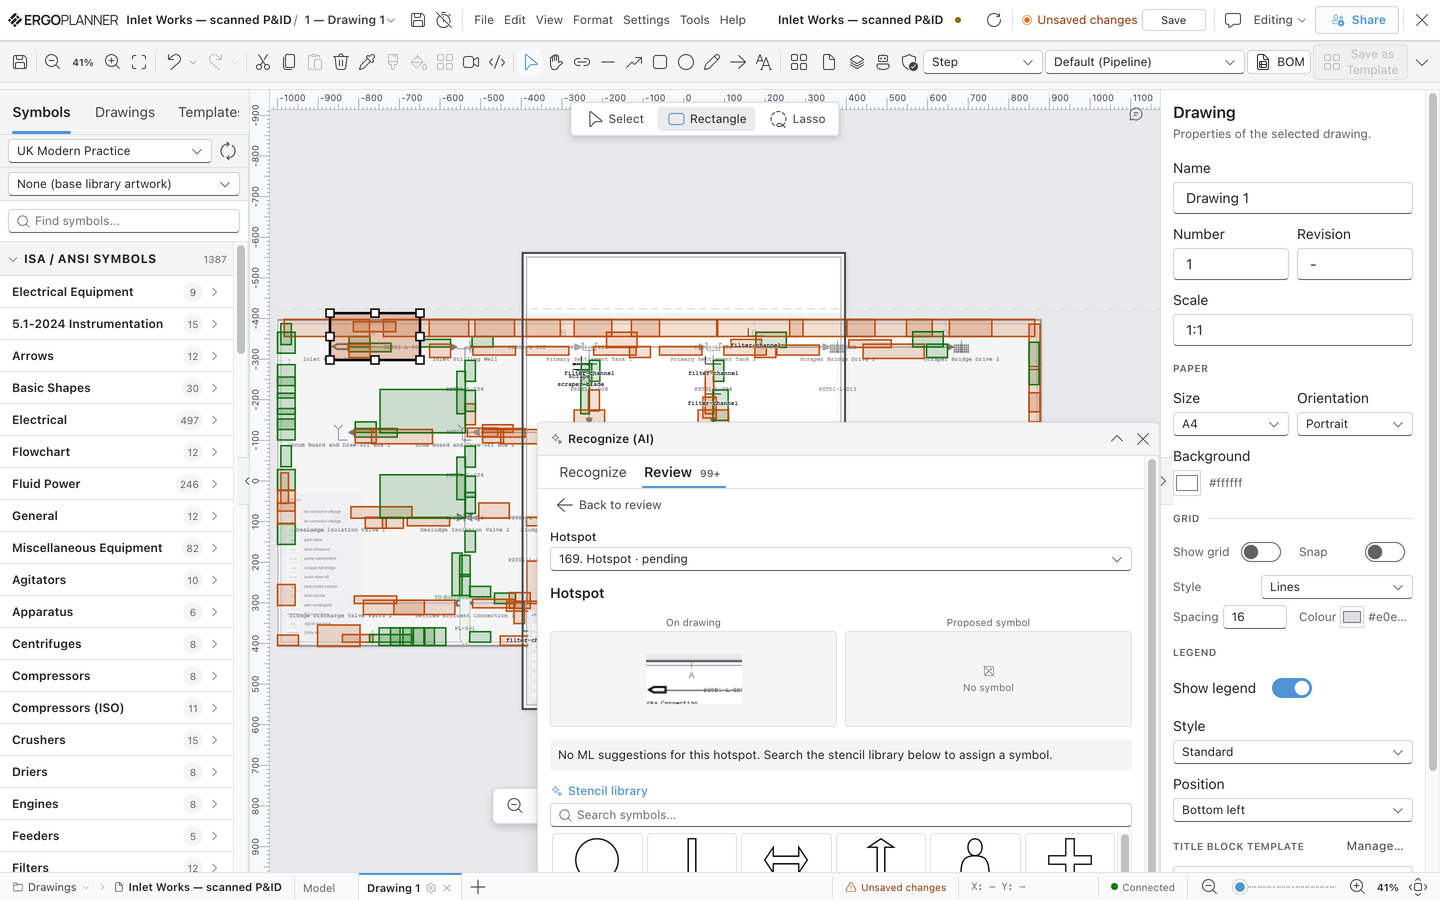
The Identify view lives inside the Recognize (AI) panel's Review tab. You land there when you select a hotspot on the canvas, or when you use a row's Identify hotspot action in the Review grid; Back to review at the top returns you to the grid.
Picking a hotspot
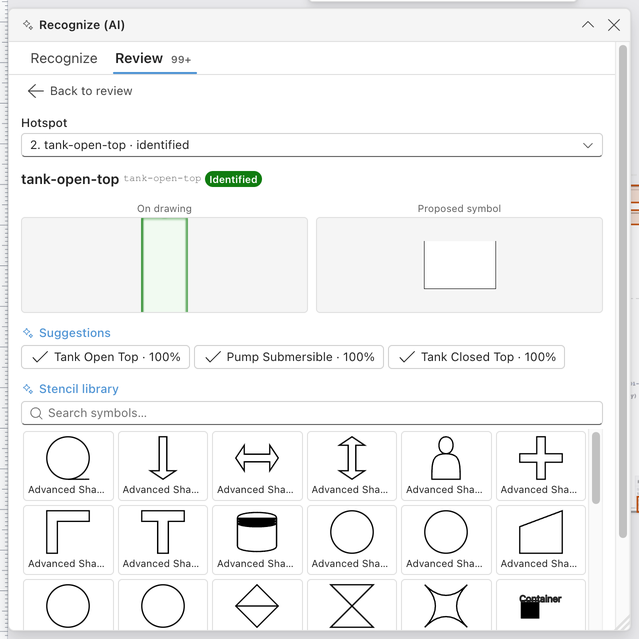
Use the Hotspot dropdown ("Choose a hotspot…") to step through hotspots without touching the canvas — entries are numbered and show each hotspot's current status. Alternatively, click a hotspot directly on the canvas.
The preview comparison
For the selected hotspot the view shows a side-by-side preview:
- On drawing — the actual crop from the imported image.
- Proposed symbol — the stencil symbol currently assigned (or the top suggestion).
Compare the two before committing — this is the fastest way to catch a wrong classification.
Suggestion chips
When the classifier has proposals, they appear as chips with a confidence percentage, e.g. "Gate valve · 87%". Click a chip to assign that symbol to the hotspot. Once assigned, the hotspot shows an Identified badge.
If there are no suggestions, the view says so — "No ML suggestions for this hotspot. Search the stencil library below to assign a symbol." — and offers Classify to generate them.
Stencil library search
Below the suggestions, the Stencil library section is a visual search grid over the full symbol catalogue. Search by name and click a tile to assign it — use this whenever the ML suggestions are wrong or missing.
Actions
- Place on canvas — places the identified hotspot as a real element at its detected position. Enabled once a symbol is assigned.
- Delete hotspot — removes the hotspot from the recognition session.
Apply to similar
After you identify a hotspot, ErgoPlanner looks for other unidentified hotspots that look the same (a P&ID typically repeats the same valve or instrument many times). When matches are found, a bar appears:
"5 similar hotspots found." — Apply to 5 similar · Also place · Skip
- Apply to N similar — assigns the same symbol to all matched hotspots in one action.
- Also place — tick this to place the matched hotspots on the canvas at the same time.
- Skip — dismisses the offer.
This is the biggest time-saver in the identification workflow — identify one instance, propagate to all of them.
Manual hotspots on the canvas
In recognition mode, a small tool toggle sits at the top centre of the canvas with three tools:
| Tool | Use |
|---|---|
| Select | Click a hotspot to select it (this also opens it in the Identify view). In Select mode the background raster stays selectable too. |
| Rectangle | Drag a box around a region the detector missed — a new hotspot is created and opened for identification. |
| Lasso | Draw a freeform outline for irregular regions; same result as Rectangle. |
With a hotspot selected:
- Move — drag it to correct its position.
- Resize — drag its corner handles.
- Delete — press
DeleteorBackspace; a confirmation dialog appears ("Delete hotspot ...? This removes the hotspot from the recognition session."). Deleting a hotspot cannot be undone. - Esc — clears the selection.
The Hotspots chip in the Recognize tab's Tools row opens the hotspot list window — the same hotspots as a list, with select and identify actions per entry.